MTS #23 – Appendix 1- Systems/Control Options Defined
SMARTSystem Management Training Series
Training Session #23 – Appendix1- Systems/Control Options Defined
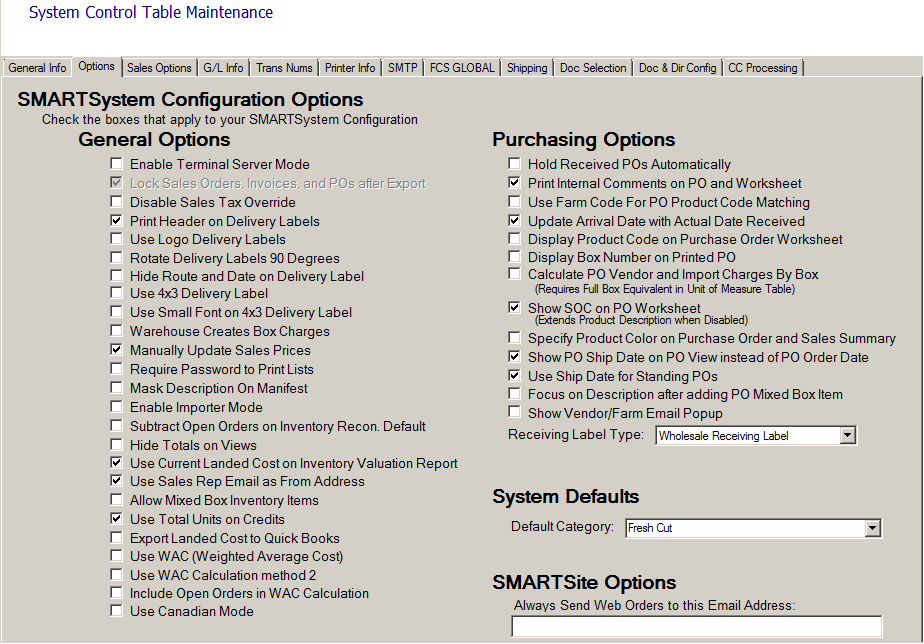
General Options:
- Enable Terminal Server Mode
Check this box to increase performance by not sending your “splash” screen graphic containing a logo. Terminal Server mode is used for remote access to your server.
- Lock Sales Orders, Invoices and PO’s after Export
This is used in conjunction with “Lock Sales Orders when Invoice” on the Sales Options, Invoice tab. Sales Orders, Invoices and PO’s can be updated or revised after data is exported to your accounting system, unless this feature is enabled. Check the box to enable and LOCK these documents after exporting to accounting. A supervisor can unlock these using a password.
- Lock Sales Orders when Invoiced is now located on the Sales Options, Invoice tab
Prevent changes to a Sales Order after it’s invoiced if this feature is off. The Invoice will be updated unless this feature is enabled. Check the box to LOCK the Sales Order after it is invoiced.
- Disable Sales Tax Override
This feature prevents a salesperson from turning on/off the checkbox for sales tax in the sales order. The customer record contains the default sales tax status and this option prevents a salesperson from making the decision.

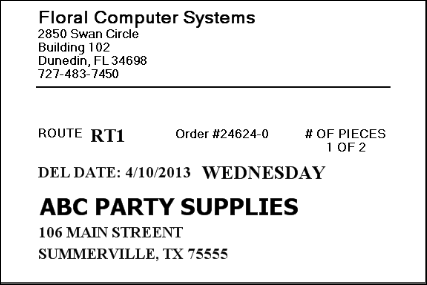
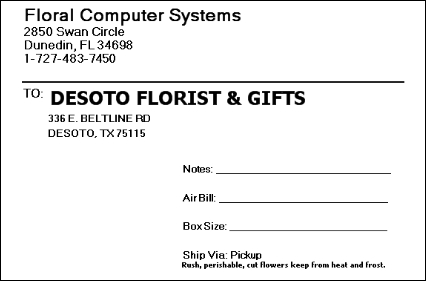
- Print Header on Delivery Labels
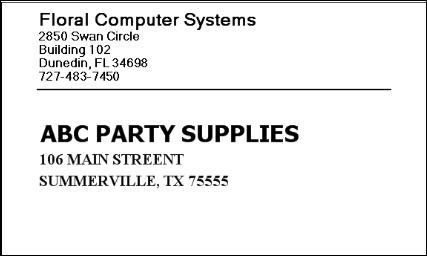
When the checkbox is enabled you print your Company information from System Control on the top of your delivery labels. Otherwise, you can use labels with pre-printed Company information. Here is a sample of a plain label with the Header printed using Company information:
Wholesaler format:
Grower format:
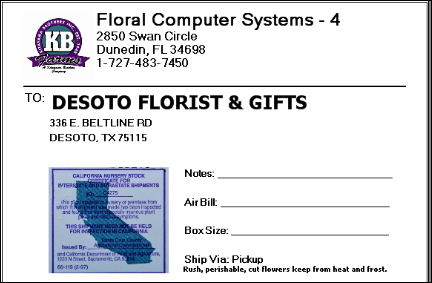
- Use Logo Delivery Labels
When the checkbox is enabled you can print your logo on the delivery label in the upper left corner. Store your .jpg file in C:\WFSDATA\LOGOS see example below for logo size:
Dimension: 300 x 300 pixels for the “LabelLogo.jpg” name
Dimension: 480 x 480 pixels for the “StateCerticifcate.jpg” name
- Rotate Delivery Labels 90 Degrees
Labels printed on a label printer feed differently depending on the label size. This box is normally not checked for the standard 4” x 3” label. When a 6” x 4” label is used you must rotate the print text.
- Hide Route and Date on Delivery Label
This checkbox provides the option to print a standard shipping label without the Route Order#, # pieces, and Delivery Date.
- Use 4×3 Delivery Label
This checkbox will set the default printer settings for the standard 4×3 labels.
- Warehouse Creates Box Charges
If you charge a box charge, your warehouse can assign the Box Charge based on the number of boxes used for packing. The screen below is at the bottom of the Warehouse Order Management Screen, see the Box Charge column below:

- Manually Update Sales Prices
Sales Prices can be calculated automatically in the Purchase Order based on the Margins you have set for each Product Type. To set the prices yourself and manually override the SMARTSystem margin calculations check this box. Log off and log onto the SMARTSystem. Under the Management Menu you will see a sub-menu item “Sales Price Maintenance.”
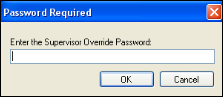
- Require Password to Print Lists
When this option is enabled, the following request for the Supervisor password is required to print any list with Customer information. The purpose of this password is to prevent an unauthorized person from taking your customer list.
- Mask Description On Manifest
Check this box to show “Fresh Cut Flowers” instead of the actual product description on the Carrier Manifest.

- Enable Importer Mode
This checkbox should only be used if you are an Importer. SMARTSystem features change as Importers typically deal in full boxes only.
- Subtract Open Orders on Invoice Recon. Detail
This checkbox will set the default value for the Inventory Reconciliation program which shows an additional column for Open Orders, not yet invoiced.
- Hide Totals on Sales Views
The customer financial status is displayed if this box is left unchecked. Check the box to hide this information on the bottom of the Customer Tab in the Sales Order Entry program.
- Use Current Landed cost on Inventory Valuation Report
Enable this checkbox to automatically set default option to “Use Current Landed Cost From Inventory.”
- Use Sales Rep Email as From Address
Emailing an Invoice, Confirmation, Quote or Price List the “From” address will be the Sales Reps email address, not the companies email address.
- Allow Mixed Box Inventory Items
This checkbox will allow the “Mixed Box / Bouquet” option to show on the inventory screen. Checking the box on this screen will display the tab “Associated Products” to enter products that make up this item.
- Use Total Units on Credits
This Checkbox would normally be checked to allow the partial return of items sold.
- Export Landed Costs to Quick Books
Normally this checkbox is off so that purchase orders are exported to Quick Books with the unit price paid to the vendor which allows you to receive and convert this PO to a bill. With this box checked, the landed cost is exported to Quick Books and the PO is received, but the vendor bill needs to be entered into Quick Books for payment.
- Use WAC(Weighted Average Cost)
This method calculates WAC by evaluating the open lots in the system by inventory item or product code. With this checkbox enabled the System will maintain Moving Weighted Average Cost (MWAC). Refer to Management Training Session #4D for additional information.
- Use WAC Calculation method 2
WAC 2 is weighted average cost calculated only when the On-hand quantity is increased, but not when it is decreased. This is based on the valuation of each inventory item. Refer to Management Training Session #4D for additional information
- Include Open Orders in WAC Calculation
When the checkbox’s above are enabled, this option takes into consideration not only the open inventory but also sales orders that have not been invoiced.
- Use Canadian Mode
This checkbox will set the SMARTSystem to function under Canadian guidelines and provide Currency Conversion.
Purchasing Options
- Hold Received PO’s Automatically
This checkbox will set the purchase order receiving process to automatically hold all products received and not put quantities into Open Market Inventory.
- Print Internal Comments on PO and Worksheet
The “I/Comment: [SAMPLES]” is printed when box is checked under each product line as shown below:

- Use Farm Code For PO Product Code Matching
This checkbox is use to pull in the most recent Units of Measure, Pack and Cost based on the Farm and Product Code from the last purchase order. When unchecked only the last Product Code is used for Costs which means that it is the last purchase from any vendor.
- Update Arrival Date with Actual Date Received
The estimated Arrival Date for the purchase order is overridden by the actual date received.
- Display Product Code on Purchase Order Worksheet
Check this box to print your product code for this inventory item on the PO Worksheet, for example ALSTSACHREP
- Display Box Number on Printed PO
Check this box to show the SMARTSystem box number assigned to this line item. This is used in conjunction with the Farm Portal.

- Calculate PO Vendor and Import Charges by Box
(Requires Full Box Equivalent in Unit of Measure Table)
Landed costs in the purchase order are normally calculated by the number of stems/bunches. In some cases, because some boxes are heavier than others the landed costs are applied by box. For this calculation to work, you must include the “full box equivalents” in the defined box size found in the Units of Measure table.

- Show SOC on PO Worksheet
(Extends Product Description when disabled)
Check this box to implement SOC (Special Order Code) on the purchase order worksheet.
The SOC can be included with each purchase order line item in the Internal Comments field. Enter from 1 to 6 characters, the pipe symbol (|) and any comment. The characters before the pipe symbol are the SOC.


- Specify Product Color on Purchase Order and Sales Summary
Check this box to replace the Internal Comments field on the purchase order line item with Color/Variety. This option changes features in the SMARTSystem and is only used when detailed inventory is not defined in the inventory table.

- Show PO Ship Date on PO View instead of PO Order Date
Check this box to show the purchase order Ship Date instead of the Order Date, see example below:

- Use Ship Date for Standing POs
Check this box to use the Ship Date day of week, instead of the Order Date day of the week for standing purchase orders.

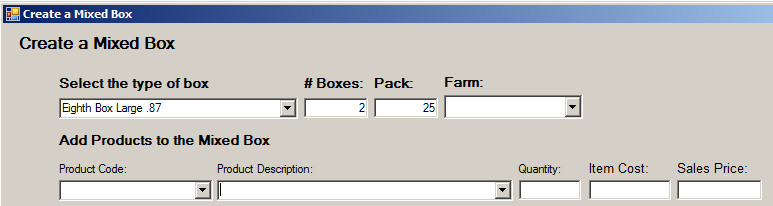
- Focus on Description after adding PO Mixed Box Item
Check this box for the cursor to always position under Product Description, instead of Product Code on the Mixed Box screen below:

- Options include:
- Wholesale Receiving Label
- Wet-Dry Label
- Importer Receiving Label
- Importer Receiving Label Code 2
System Defaults

This System Default for Category (above) applies to Sales Order Entry. On any of the Sales Order Entry inventory screens the “Category” will use this default to display product in that category:

SMARTSite Options

This is used for our e-Commerce site and the System will send an email to one or more addresses in this box when a web order is received from a customer. This address is used in addition to the sales reps email for the customer. Our SMARTSite, e-Commerce site will always send an email to the customer sales rep and the sales manager can be notified using this address box.